
Glowforge
Background
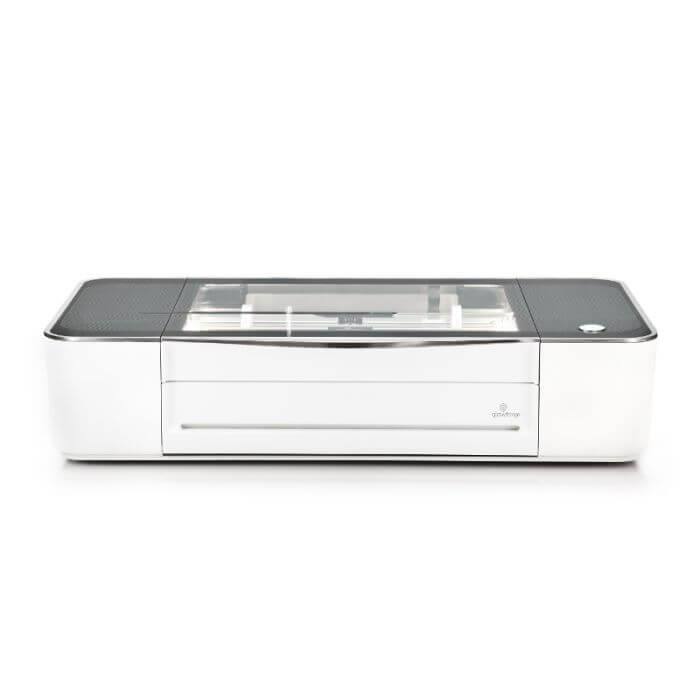
Glowforge is a user-friendly laser printer that cuts and engraves wood, acrylic, cardboard, leather and more.
Parts List
- Glowforge Laser Printer
- Air Filter
- Glowforge proprietary application

To purchase certified materials and accessories visit:
Getting Started
To use the Glowforge, be sure the machine and filter are both plugged in and turned on.
The power button and plug is located on the right side of the filter while the power button and plug for the Glowforge is located on the backside of the unit.
Glowforge consists of only one button that
acts as a start button.
Please note: in the event of an emergency, unplug the device right away.
Using Glowforge App
The Glowforge app is free to use but also has premium features for additional costs. For our purposes, the free account works just fine.
To begin using the app, sign up at:
app.glowforge.com/
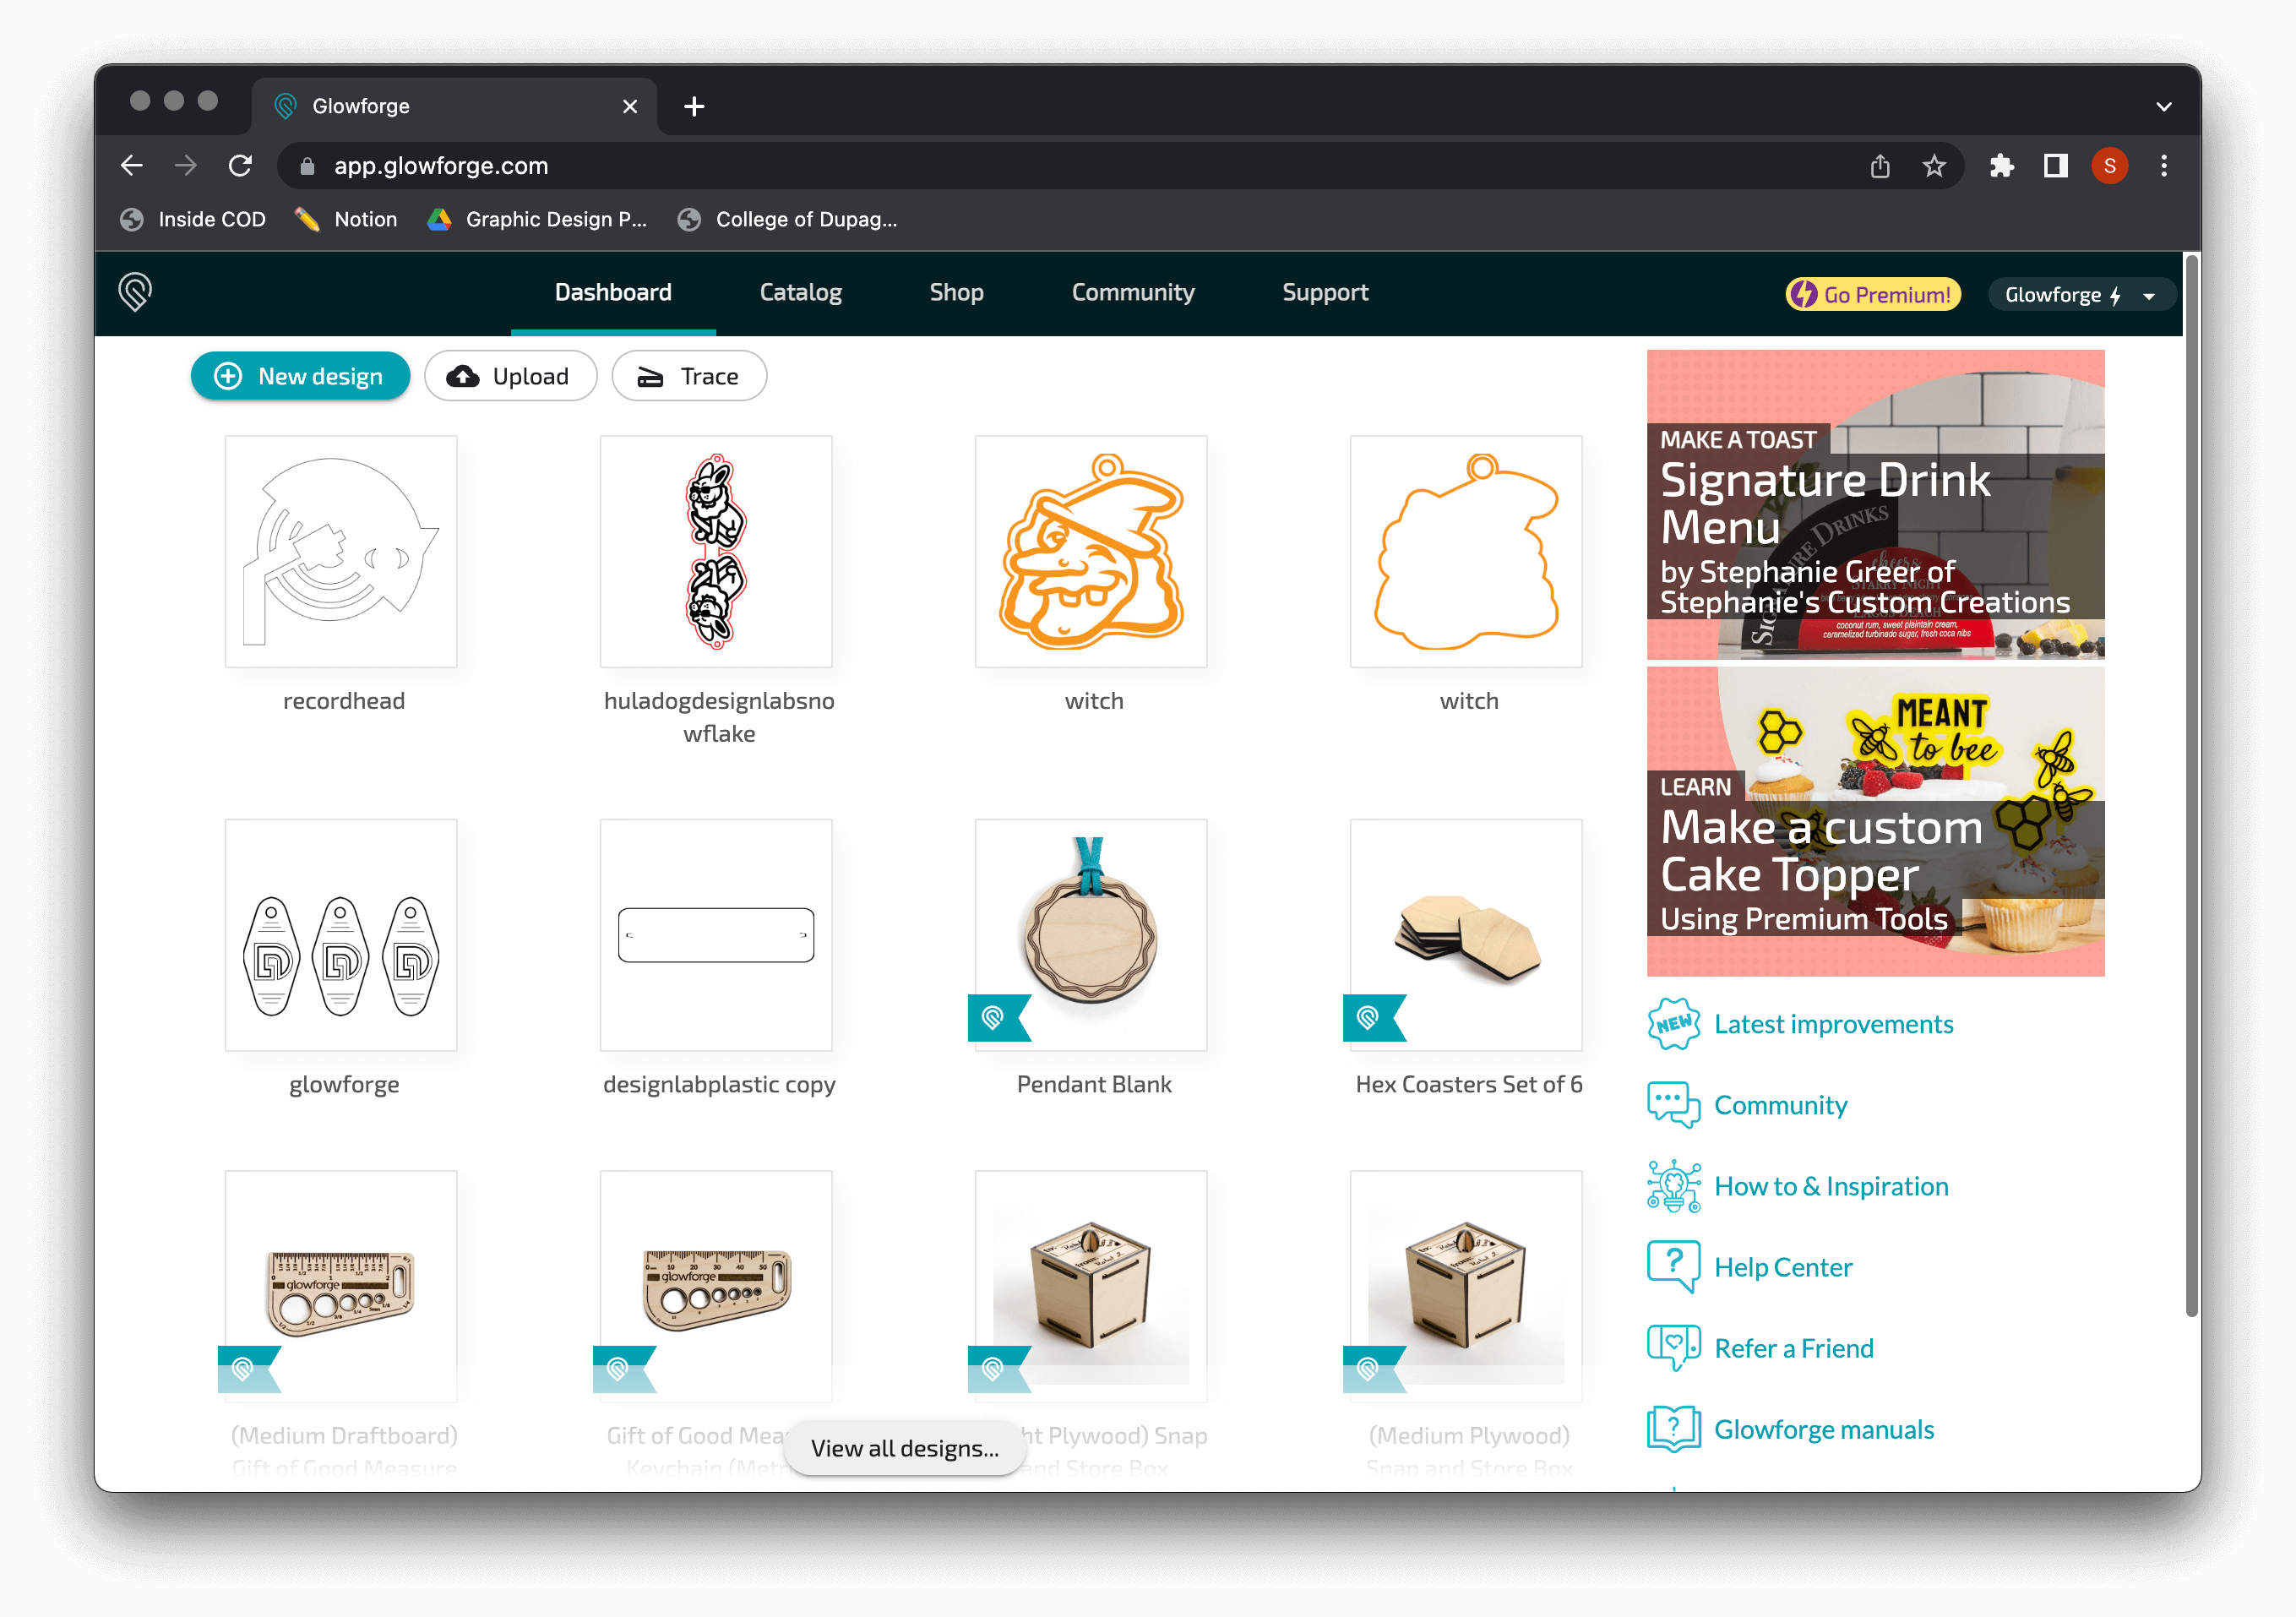
Glowforge Dashboard
After creating an account, you will be taken to the Glowforge dashboard.
Here you will find previously used designs as well as designs available for purchase provided by Glowforge.
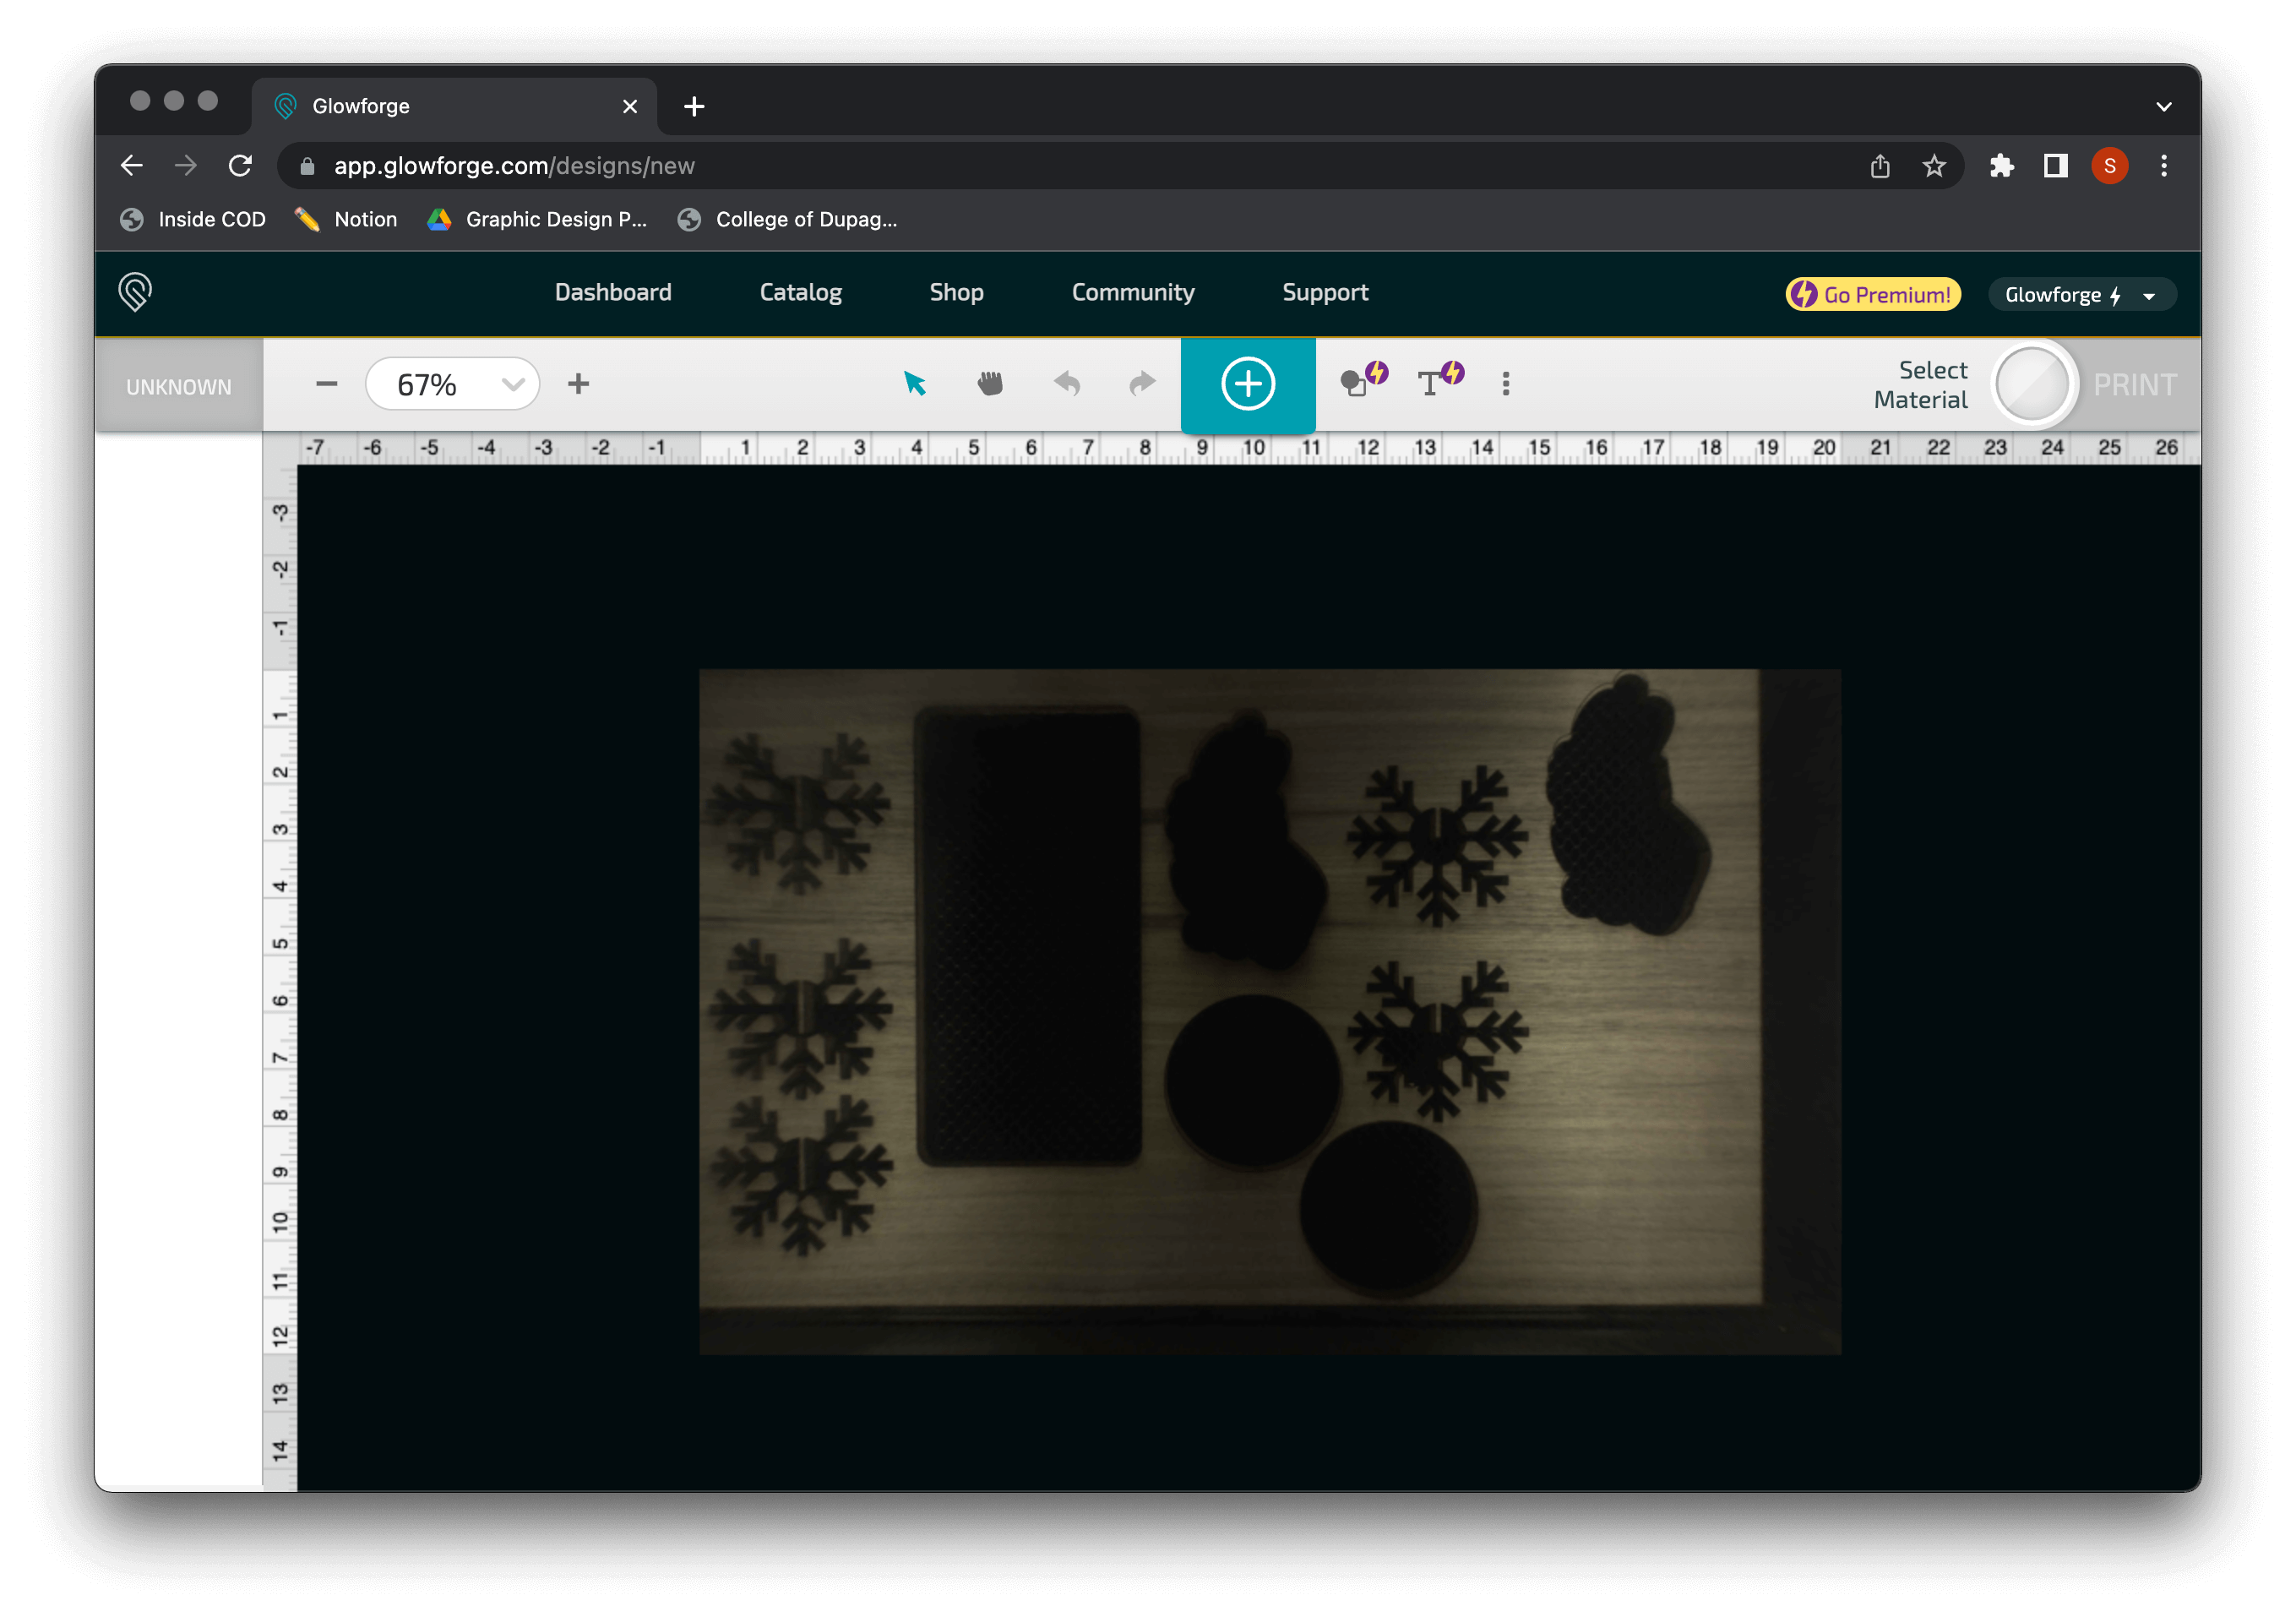
Creating a New Design
After selecting “new design” you will be taken to a live view of what is inside the Glowforge. To illustrate this, the example here shows material that has been previously cut.
This comes in handy when making changes, redoing a cut or leveraging all space available on your material. However, be mindful if using the live view as it does have a tendency to shift when doubling back over cuts.
File Types
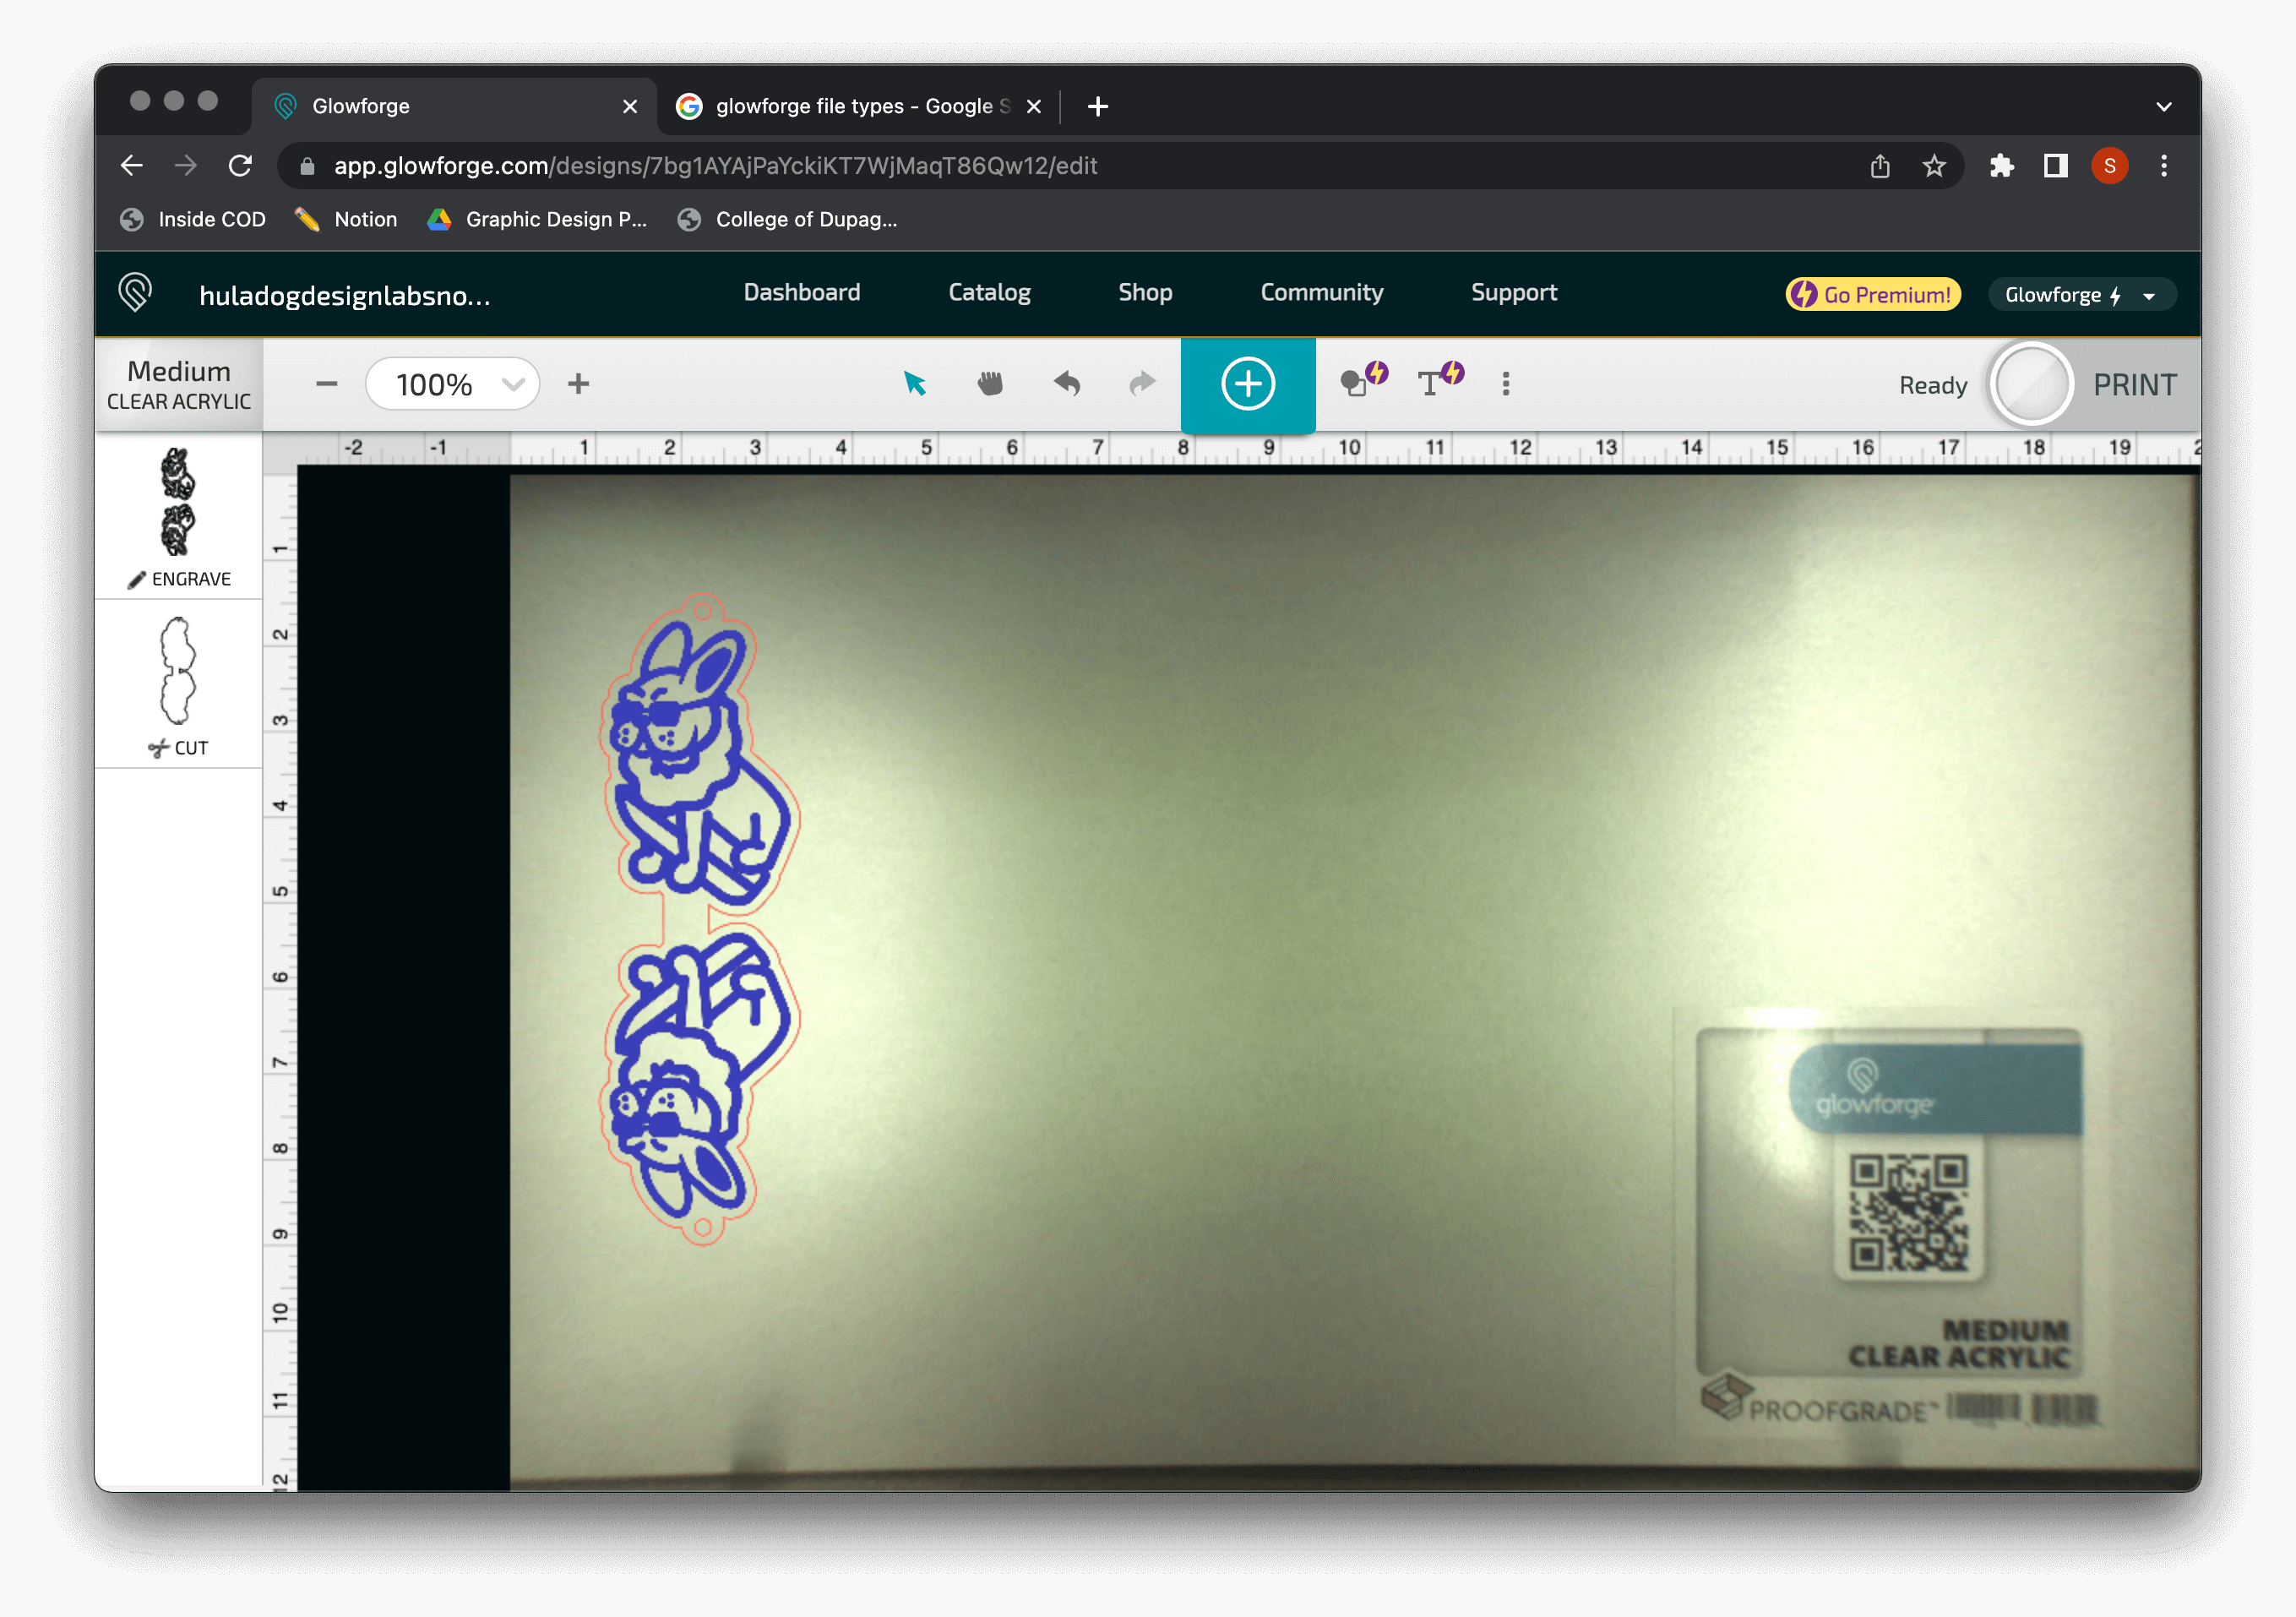
The Glowforge app accepts JPG, PNG, SVG, PDF when creating designs.
In our testing, we have found it best to use SVG files. When doing so, be sure that all text is converted to outlines or else you will get an error from Glowforge.
Using SVG files easily allows you to easily separate layers when creating your artwork.
Layer types: cut, engrave, score and ignore.
Note: Strokes cut, fills engrave.
Materials
Glowforge has their own brand of materials that work seamlessly with the device. These “proof-grade” materials come pre-loaded with a QR code that will automatically adjust the settings to provide the best results when cutting.
It is highly recommend to use the proof-grade material as it makes for a much smoother process.
To learn more about proof-grade materials visit: glowforge.com/materials
Tested Materials
The major materials that we have tested include: wood, acrylic, and leather. We have tested both proof-grade materials directly from Glowforge as well as materials from third-party vendors.
In working with the third-party materials, there is much more of a learning curve.
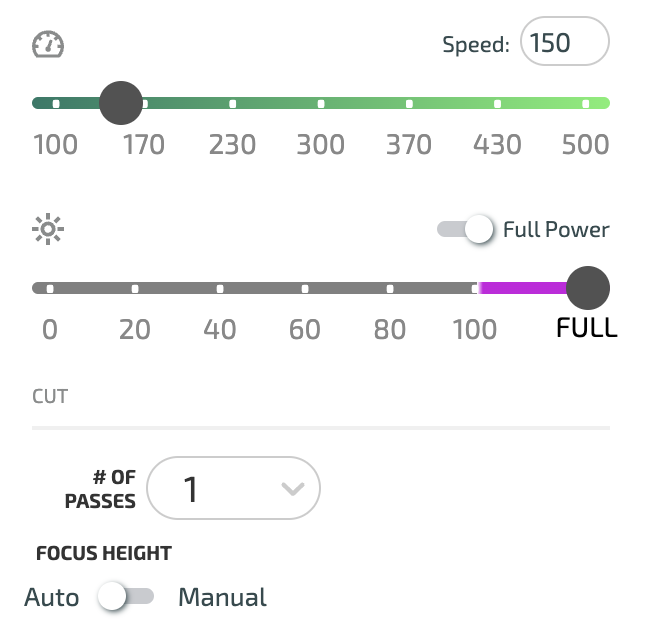
Settings in the Glowforge can be adjusted for example to create deeper engravings by using slower speeds and a higher power level.
However, in using higher power on a third-party material, there can be unpleasant scorch marks that come from when the laser burns onto the material if they are not covered by a protective layer.
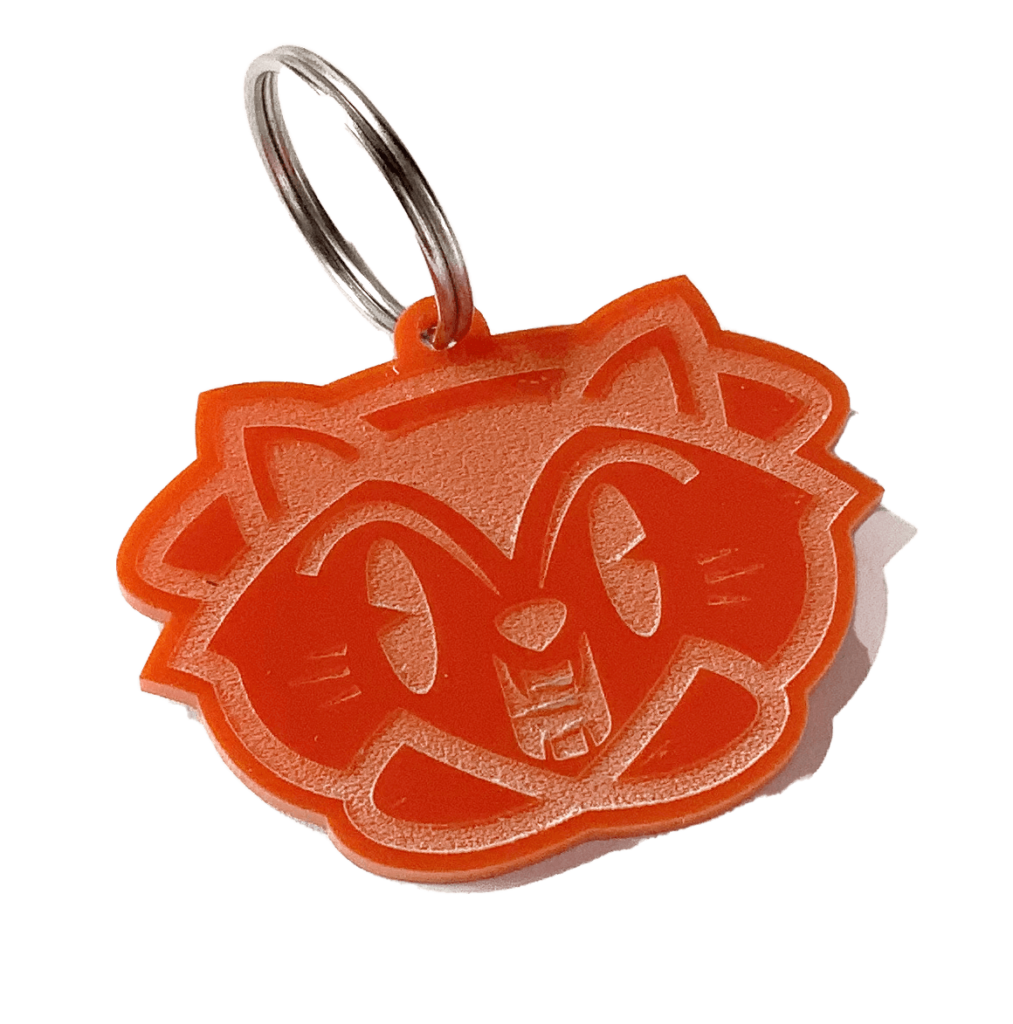
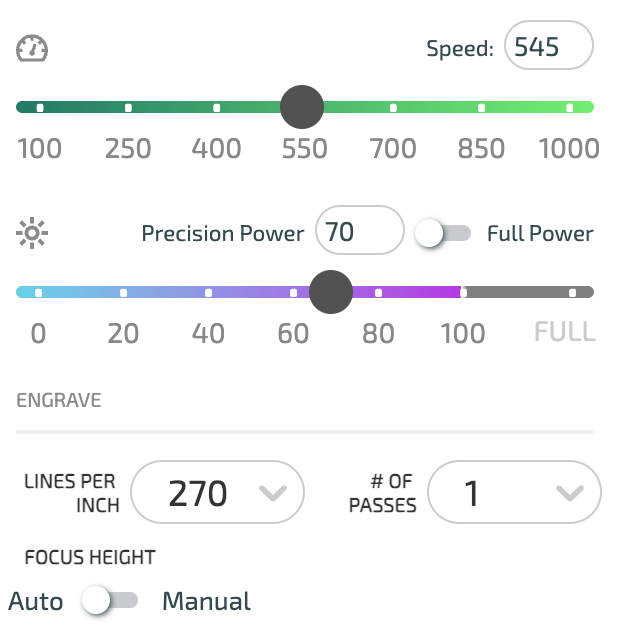
1/8″ Acrylic Settings
Perfect for keychains, signage, jewelry and more, acrylic is a great option for anyone looking for a design with a very clean look and feel.
Leather Settings
Great for patches or small accessories, we used 3M transfer tape to create a double sided keychain with great results and no sewing.
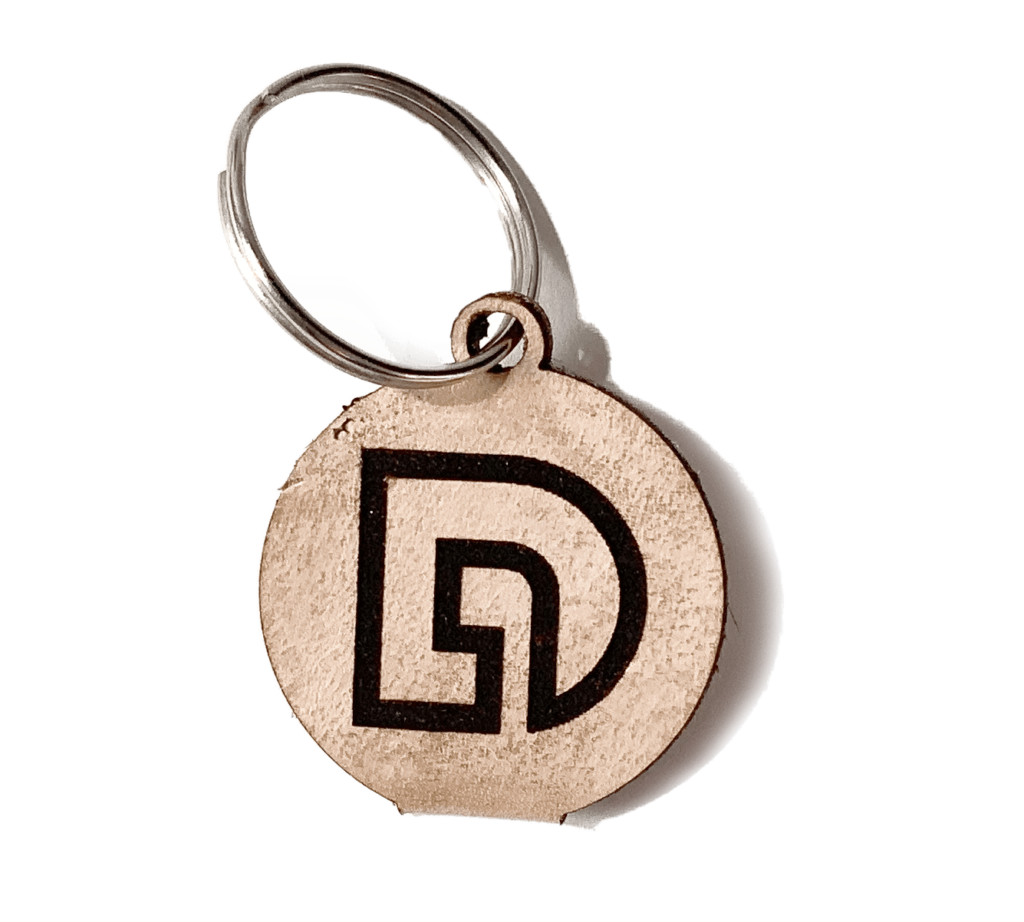
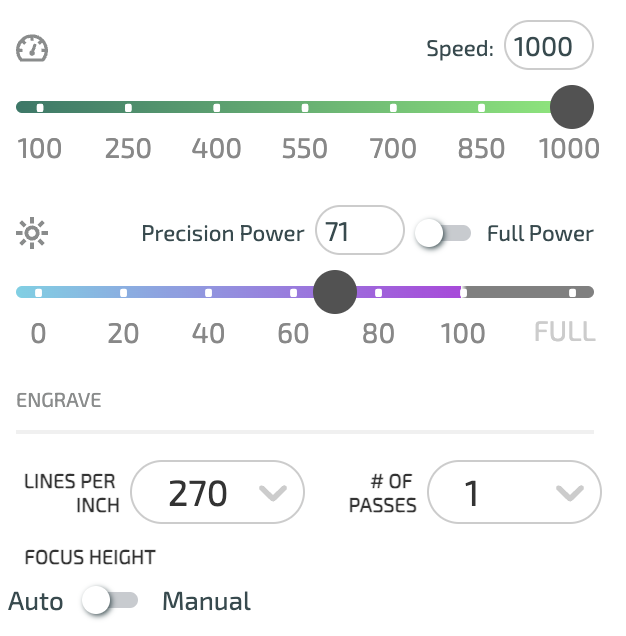
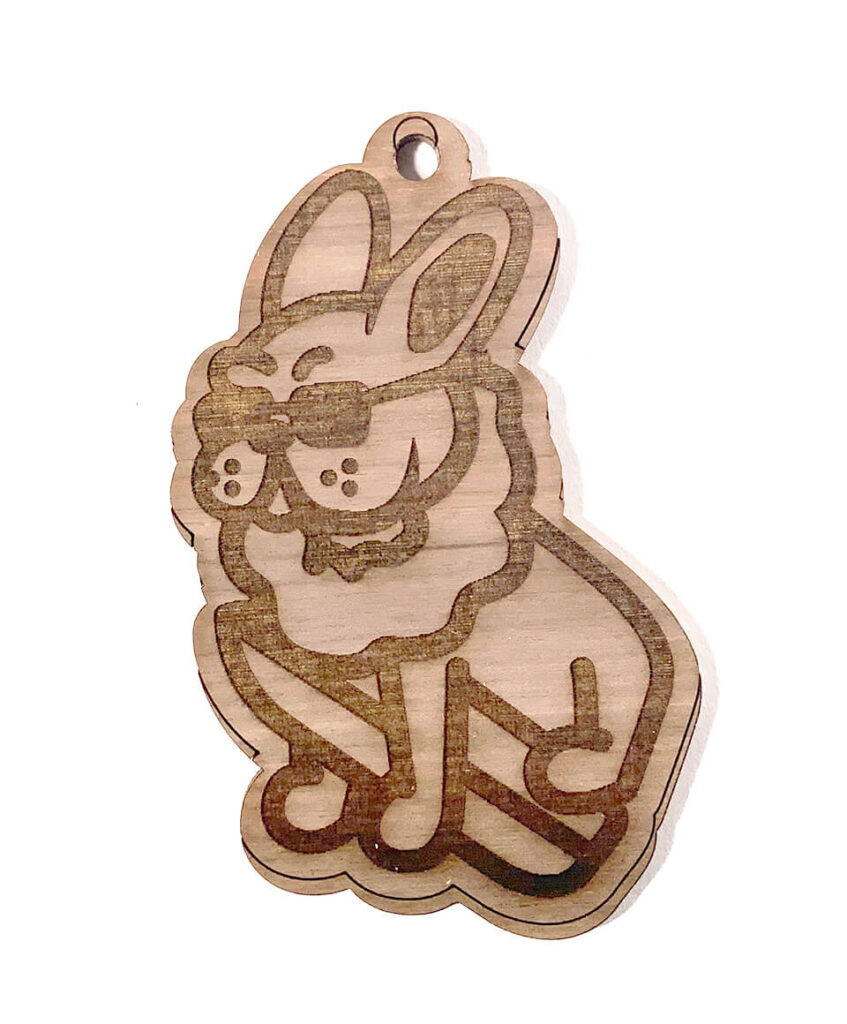
1/8″ Wood Settings
With seemingly endless possibilities, wood is great for creating ornaments, shadowboxes, awards, signage and many other items.
Practical Applications for Graphic Designers
As related to graphic design, Glowforge machines can be a great tool when creating items related to personal branding or even a side business.
- Keychains
- Signage
- Ornaments
- Coasters
- Shadowboxes
We will continue to seek out improvements and updates to this machine and process
If you have any questions or comments, please contact us at: heintzs@cod.edu
